The Easiest DIY 4th of July Wreath You’ll Ever Make
The Easiest DIY 4th of July Wreath You’ll Ever Make
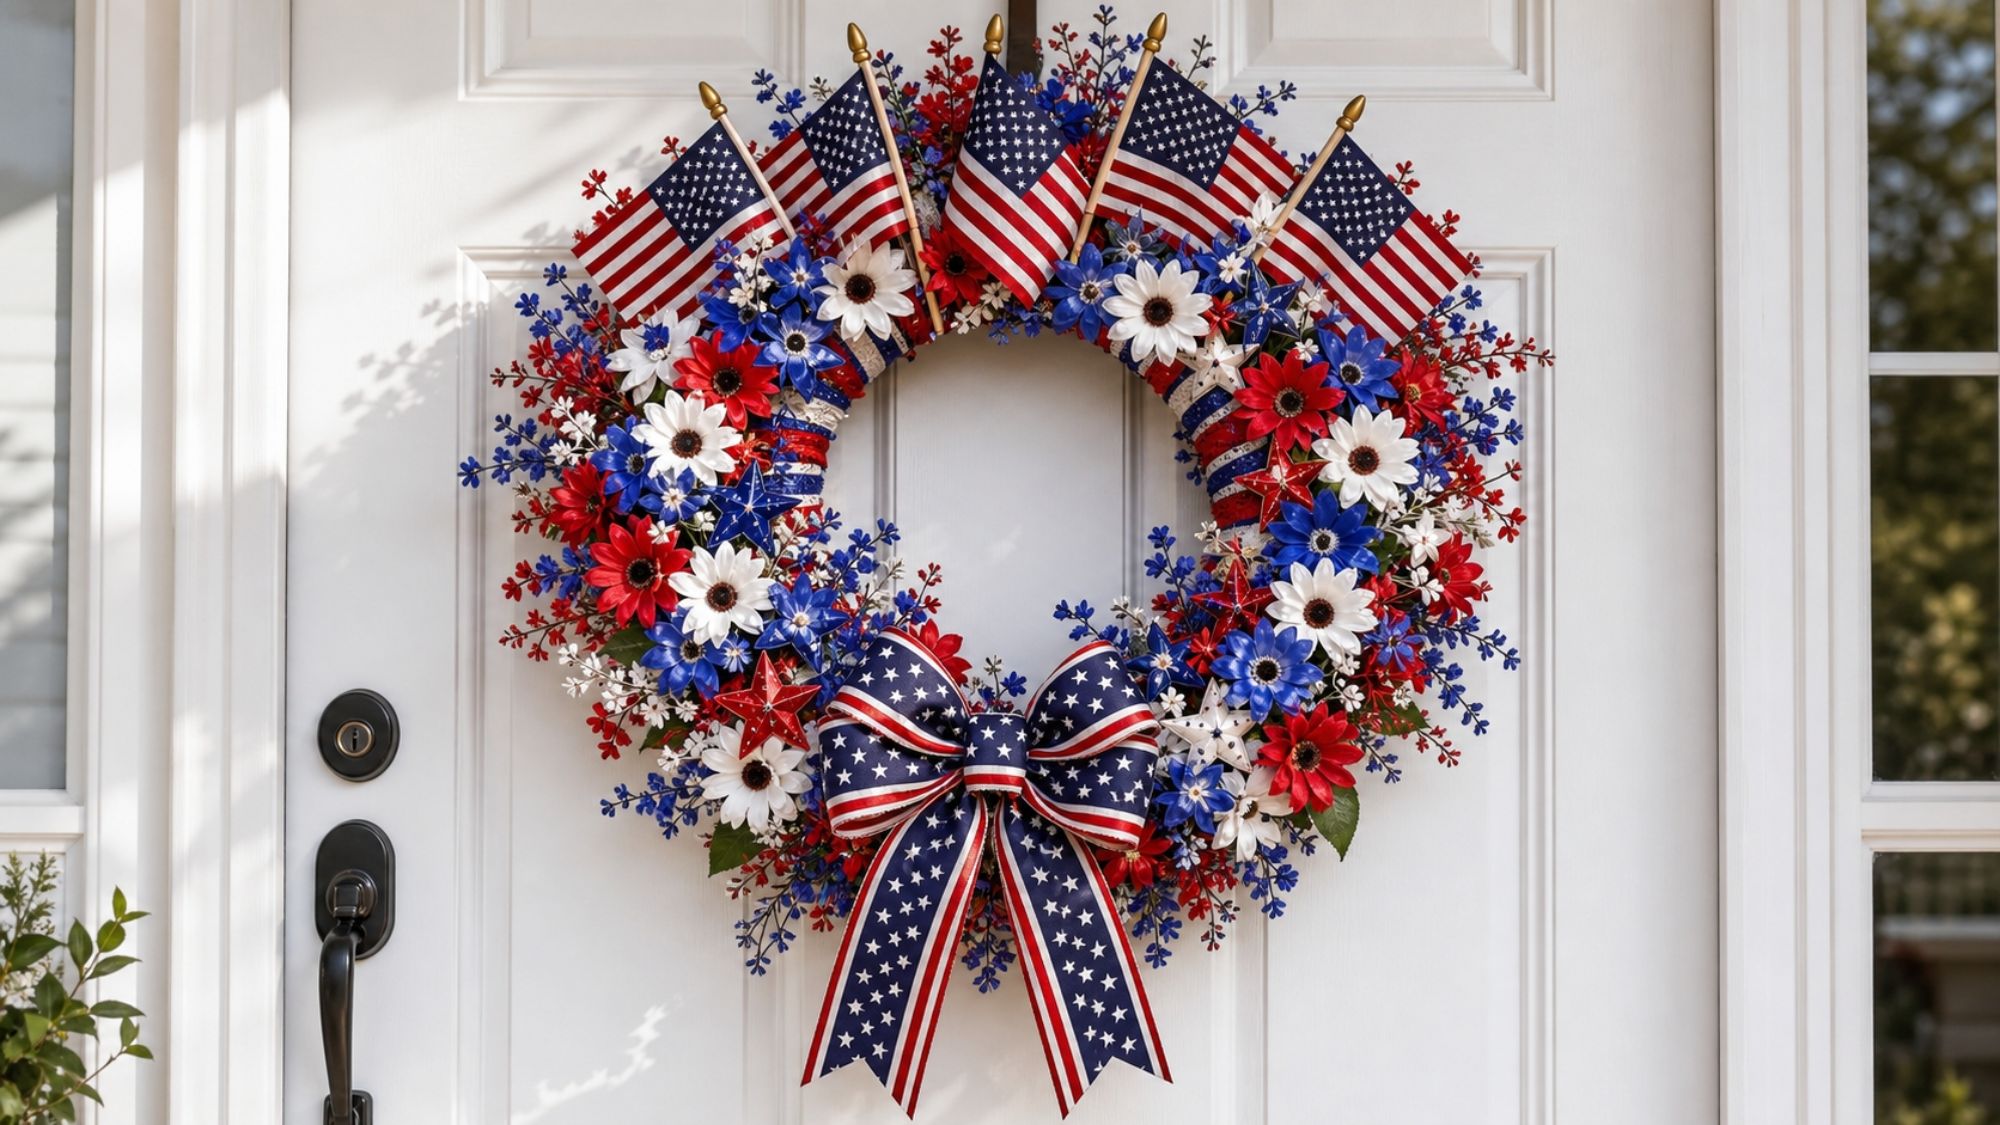
A beginner-friendly, budget-friendly patriotic wreath that looks absolutely stunning on your front door.
The 4th of July is one of my absolute favorite holidays to decorate for — and nothing sets the patriotic tone quite like a beautiful wreath on your front door. This year I put together this simple DIY that uses a natural straw wreath base, pre-made patriotic ribbon, gorgeous artificial flowers, and a few flag and star accents to create something that honestly looks like it came from a boutique shop.
The best part? You don’t need any crafting experience whatsoever. If you can use a hot glue gun (or even floral pins!), you can make this. I’ve broken it down into seven easy steps with all the exact products linked so you can grab everything from Amazon and have it at your door in a couple of days.
Let’s make something beautiful.
What You’ll Need
Here’s everything I used to make this wreath. All items are linked to Amazon — I’ve included both a short affiliate link and a note about each product to help you shop quickly.
FloraCraft Straw Wreath Form — 12 Inch Natural
The perfect base — natural straw is easy to pin and glue into, and the 12-inch size works great for a standard front door.
Shop on Amazon →Small American Flags (Kid-Safe Polyester)
Uelfbaby’s sturdy little flags are tear-resistant and hold up beautifully outdoors. I used 4–5 fanned across the top.
Shop on Amazon →Patriotic Star Garden Stakes
These red, white, and blue star stakes add serious dimension and are easy to push right into the straw base without any glue.
Shop on Amazon →Patriotic Stars & Stripes Bow (Pre-made)
This Hongsome patriotic bow is the focal point of the entire wreath. It comes ready to attach — no bow-tying required!
Shop on Amazon →Artificial Patriotic Flower Arrangement
This red, white & blue faux floral stem bundle is gorgeous and super full. It gives the wreath that lush, layered look.
Shop on Amazon →Artificial Daisy Bouquet — Red, White & Blue
A second flower type adds texture and variety. These cheerful daisies fill in gaps and make the wreath look abundant.
Shop on Amazon →Patriotic Wired Ribbon — Stars & Stripes
This wired ribbon wraps the straw base to hide the natural color and gives a clean, polished look before you add the flowers.
Shop on Amazon →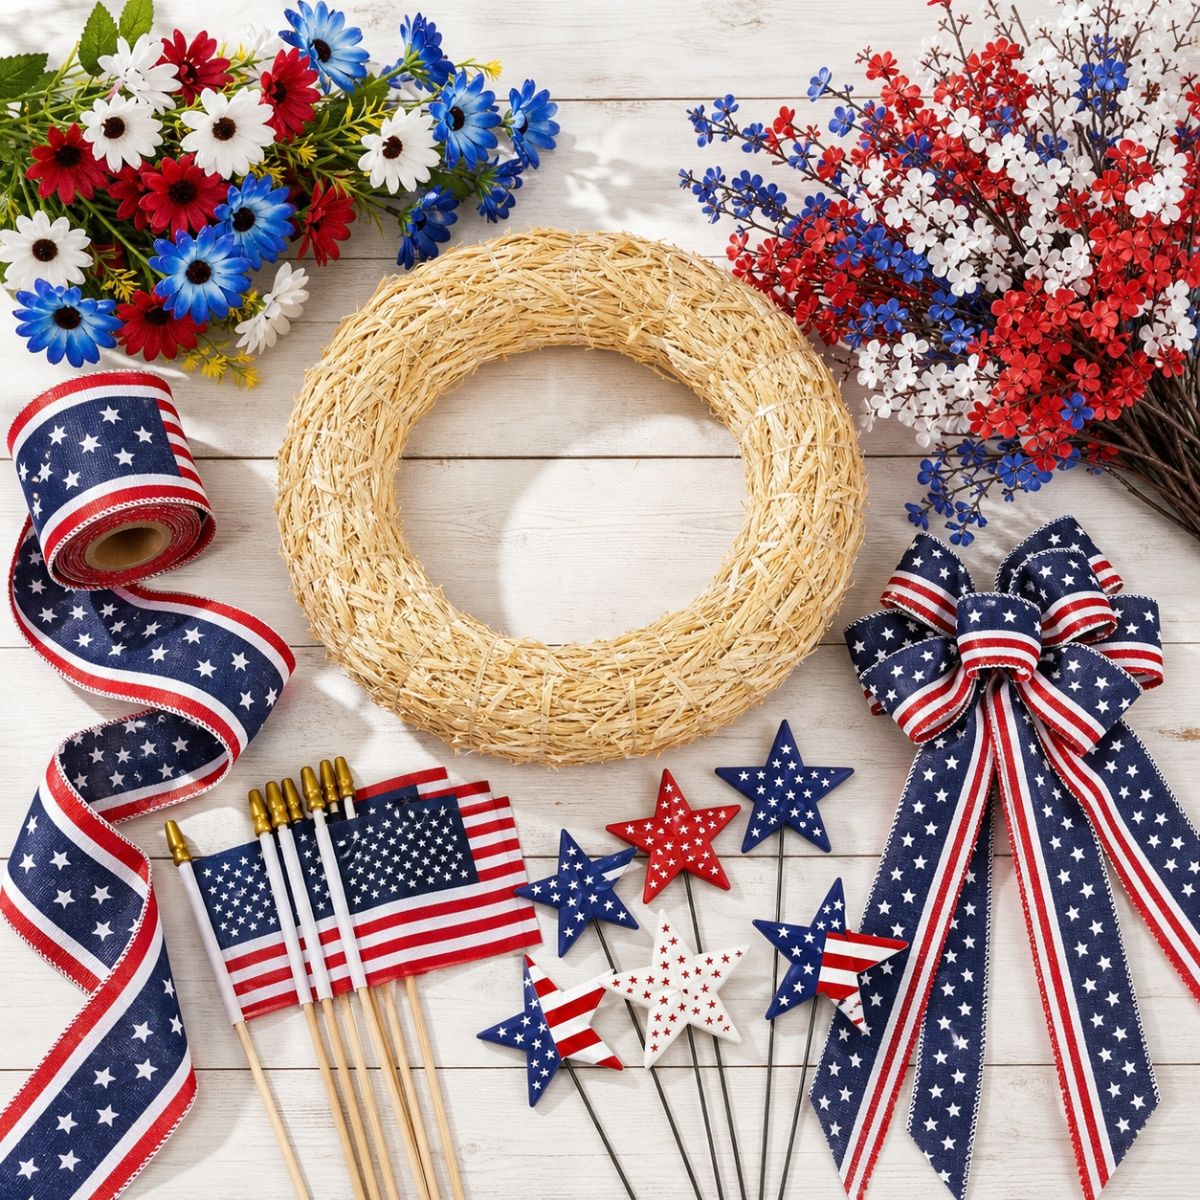
Everything you need — grab it all from Amazon and you’re ready to go.
How to Make Your 4th of July Wreath
Follow these seven steps and you’ll have a finished wreath in under an hour. Take your time with step 3 (placing the flowers) — that’s where the magic happens.
Prep Your Wreath Form
Unwrap the FloraCraft Straw Wreath Form and lay it flat on your workspace. Cut a 10-inch length of floral wire and thread it through the straw at the top back of the wreath, twisting it into a loop — this will be your hanger. Twist securely and press the ends into the straw so nothing pokes out.
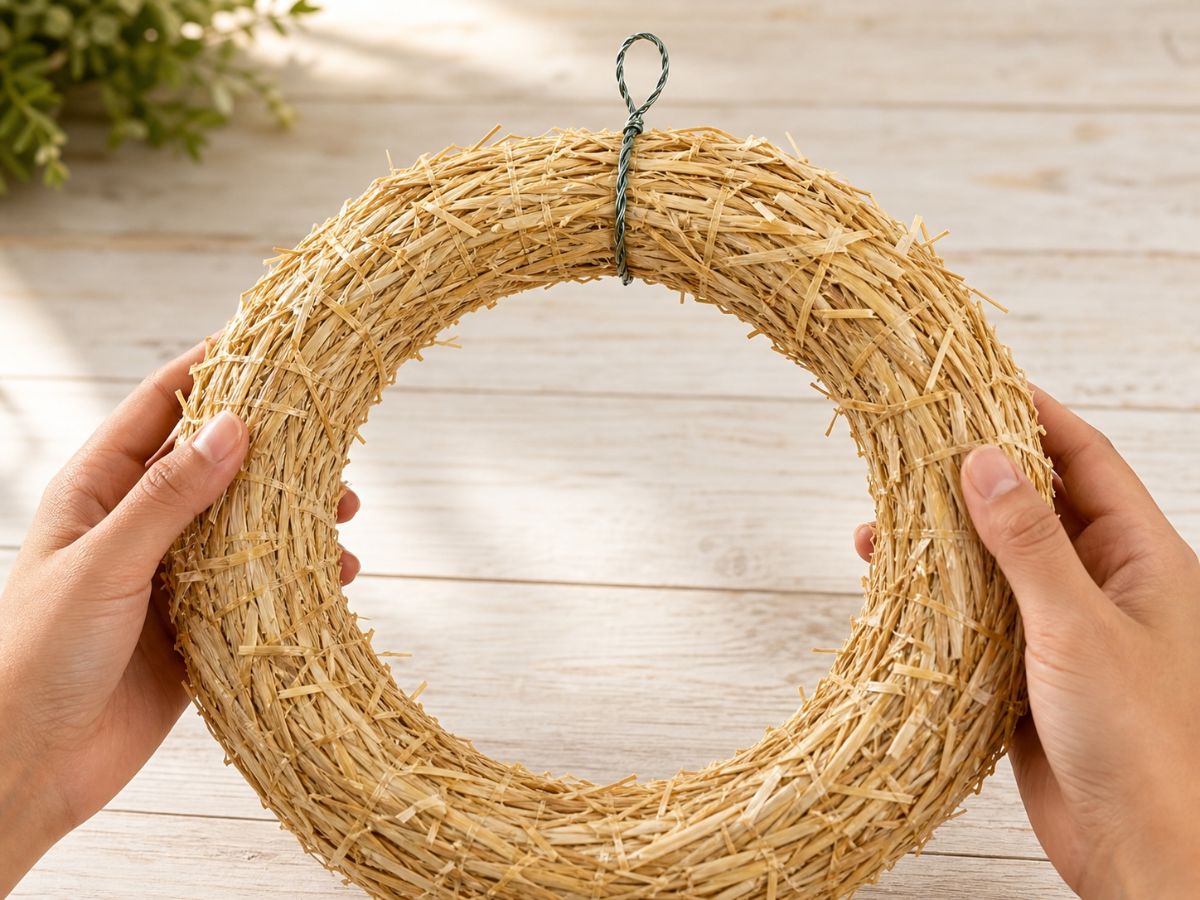
Attach your wire hanger first — it’s much easier before everything else is on.
Wrap the Base with Ribbon
Starting at the back of the wreath, secure the end of your patriotic wired ribbon with a dab of hot glue or a floral pin. Then begin wrapping the ribbon around the wreath form at a slight diagonal angle, overlapping slightly as you go to avoid gaps.
Work your way around the entire wreath, keeping the tension even. When you reach the start, secure the ribbon end with another dab of hot glue at the back. Trim any excess. The wired edges of the ribbon help it sit neatly without slipping.
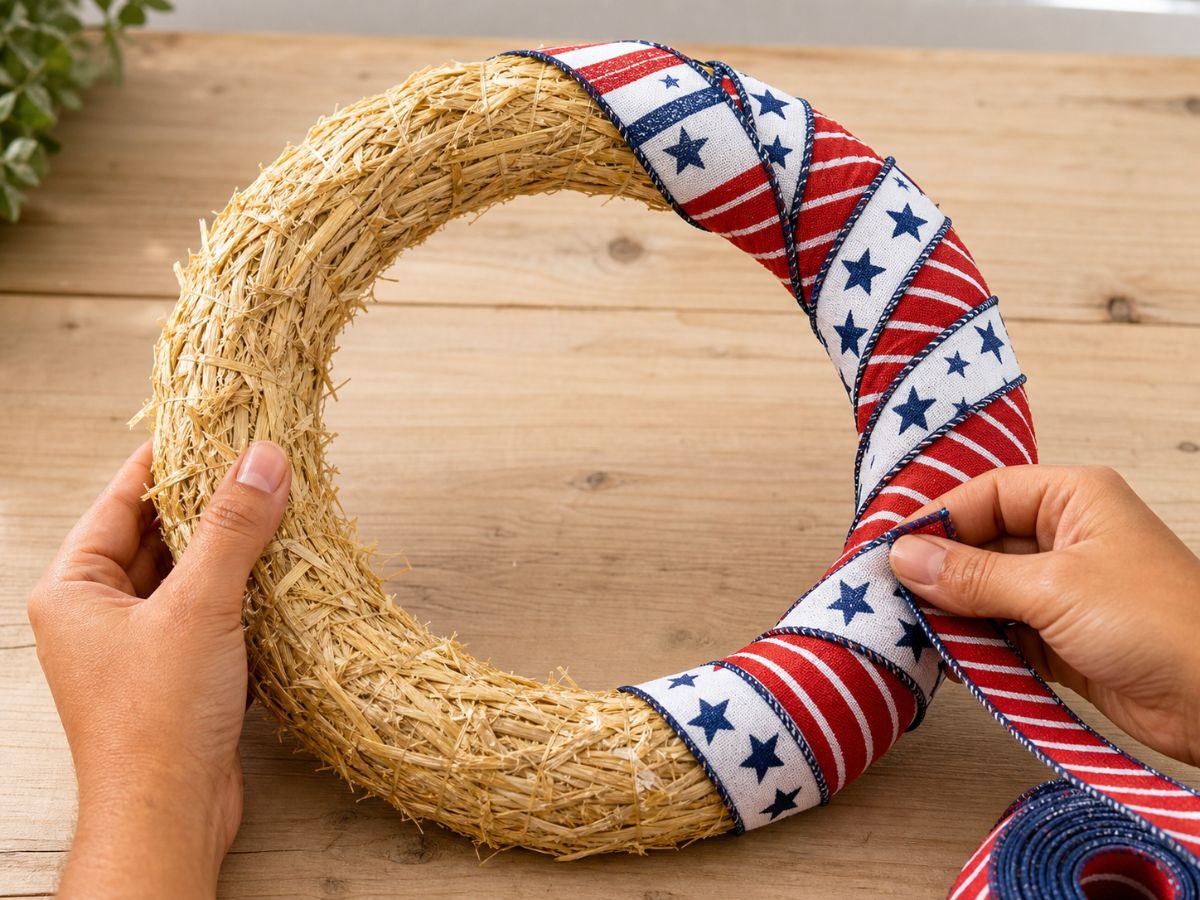
Wrap at a diagonal to get full, even coverage with no gaps.
Build Your Flower Clusters
This is the most important step and also the most fun! Start by separating your artificial flower stems. Take the larger patriotic arrangement and cut individual stem clusters apart so you can place them individually — this gives you much more control than trying to shove the whole bunch in at once.
Work around the lower two-thirds of the wreath (roughly 7 o’clock to 5 o’clock going around the bottom), hot gluing or pinning stems at angles so they fan outward naturally. Layer the taller stems first, then fill in gaps with the daisy clusters. Aim for a lush, abundant look — don’t be shy about overlapping.
Step back frequently to check the overall balance. You want more visual weight at the bottom (where the bow will go) and a gradual fade toward the top sides.
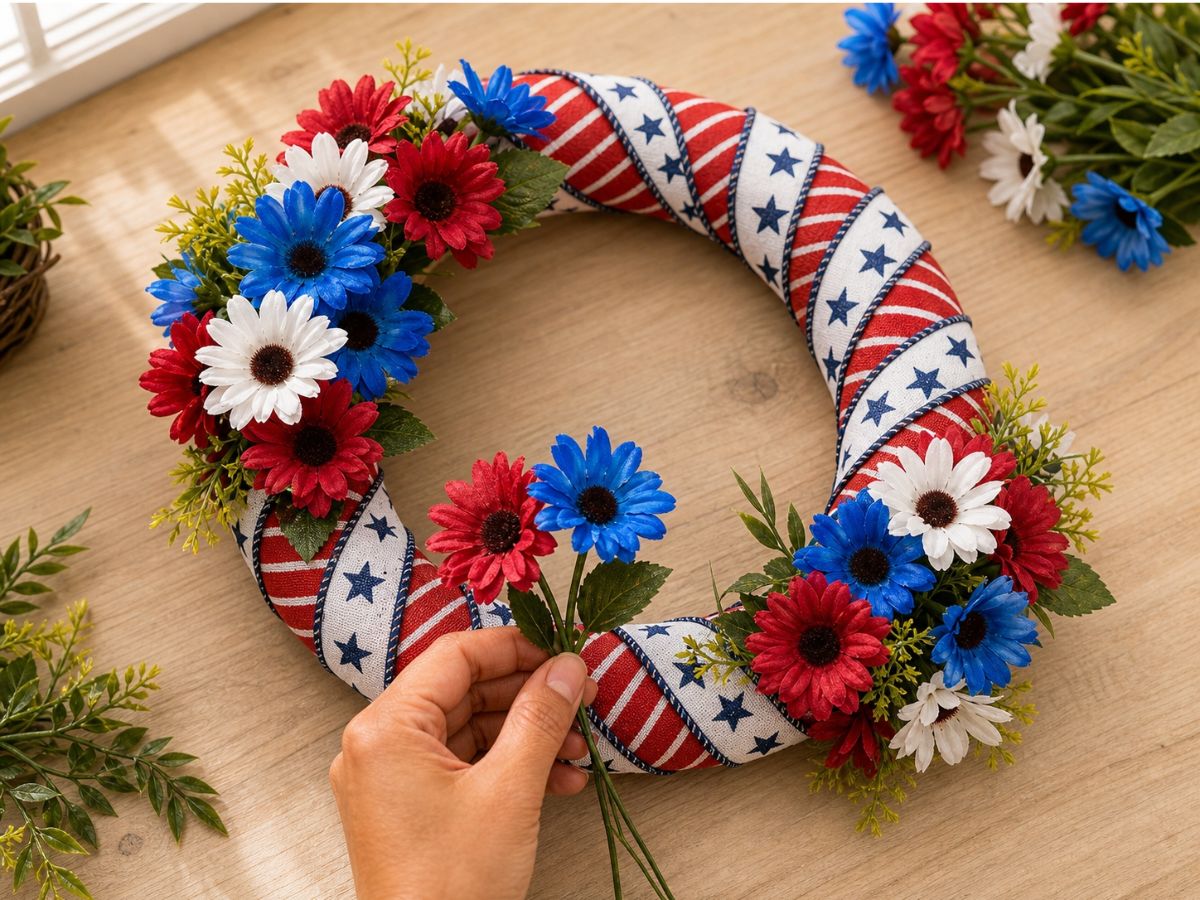
Work from the outside in and layer as you go — this is where the magic happens.
Add the American Flags
Take your small American flags and push the wooden sticks directly into the straw base — no glue needed here. Fan 4–5 flags across the upper portion of the wreath, spacing them evenly. Tilt the outer flags slightly outward for a celebratory, spread-out look.
If the sticks feel loose, secure with a small dot of hot glue where the stick meets the straw. The flags bring instant patriotic impact and height to the upper wreath.
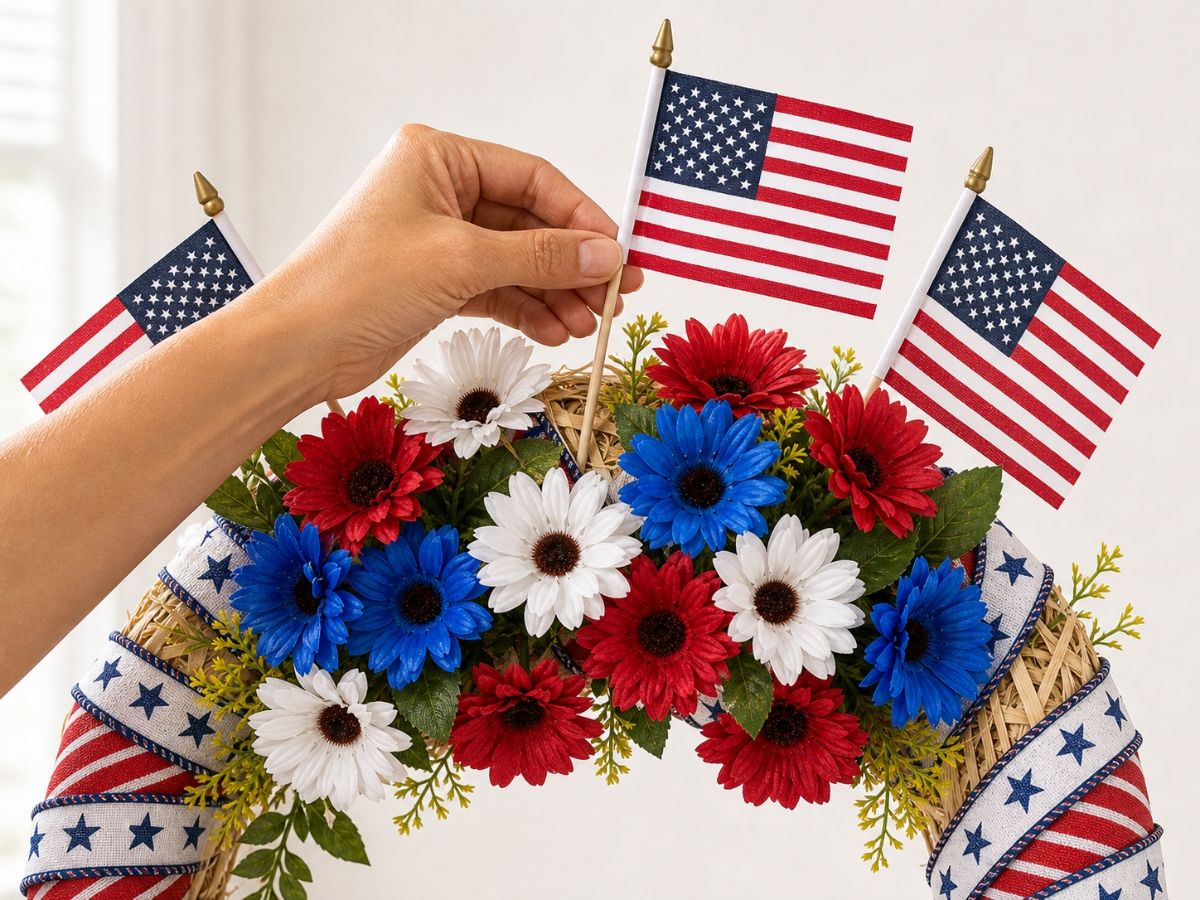
Fan the flags slightly outward for a festive, celebratory look.
Place the Star Accents
Take the patriotic star stakes and cut or bend them down to a shorter length if needed. Push them into the straw at various points throughout the flower clusters — nestle some stars deep into the flowers so just their tops peek out, and let others stand a bit taller for dimension.
Use a mix of red, white, and blue stars scattered throughout for balance. A few stars tucked near where the bow will go work especially nicely as a frame for that focal point.
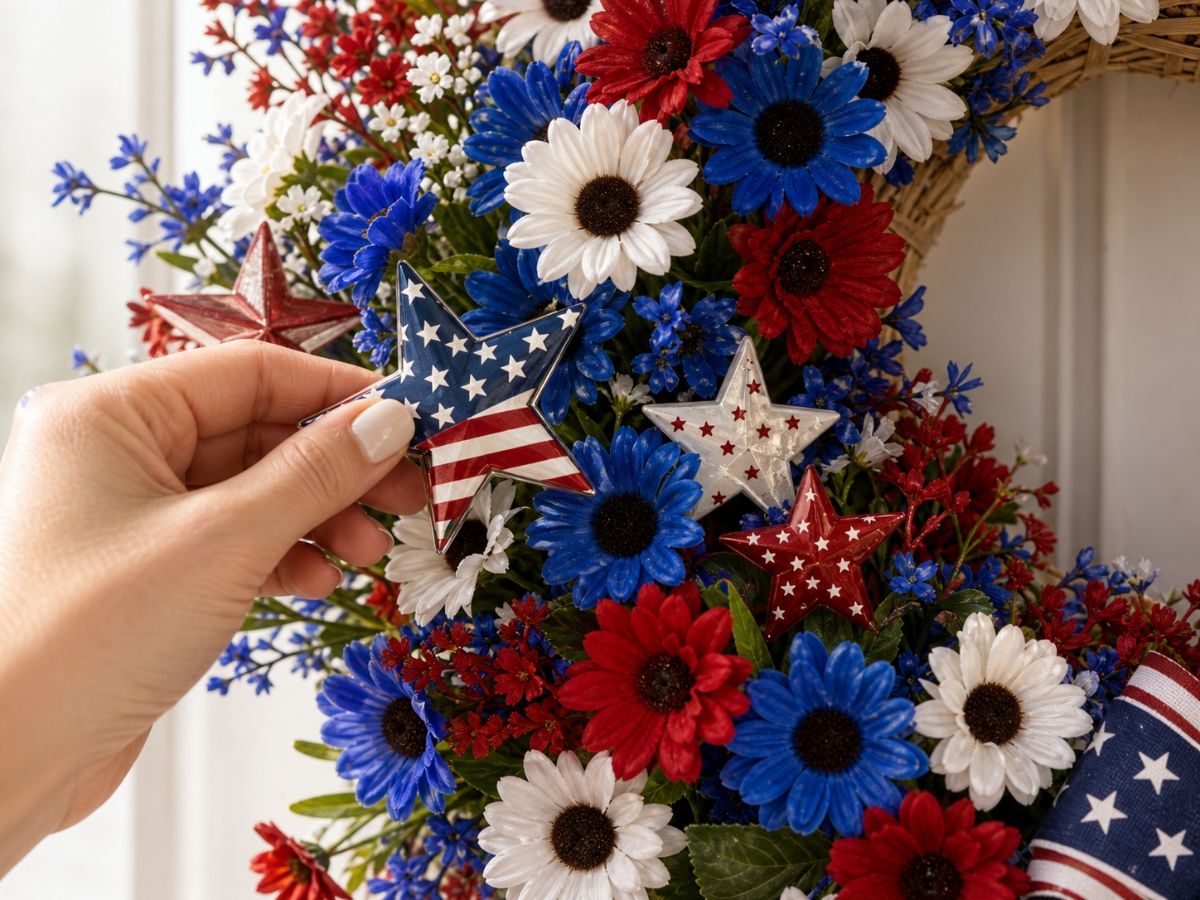
Nestle stars at different depths — some deep in the flowers, some standing taller — for a layered effect.
Attach the Patriotic Bow
The bow is the star of the show and goes on last so it sits on top of everything. Position it at the lower center of the wreath (around the 6 o’clock position) and hot glue the back of the bow securely to the wreath base. Hold it firmly for 20–30 seconds while the glue sets.
For extra security — especially if the wreath will be outdoors — run a short piece of floral wire through the back of the bow’s center knot and twist it around the straw form beneath. This ensures the bow won’t shift even on a windy day.
Fluff and arrange the bow tails so they drape naturally downward. Spread the loops apart to give the bow its full, dimensional shape.
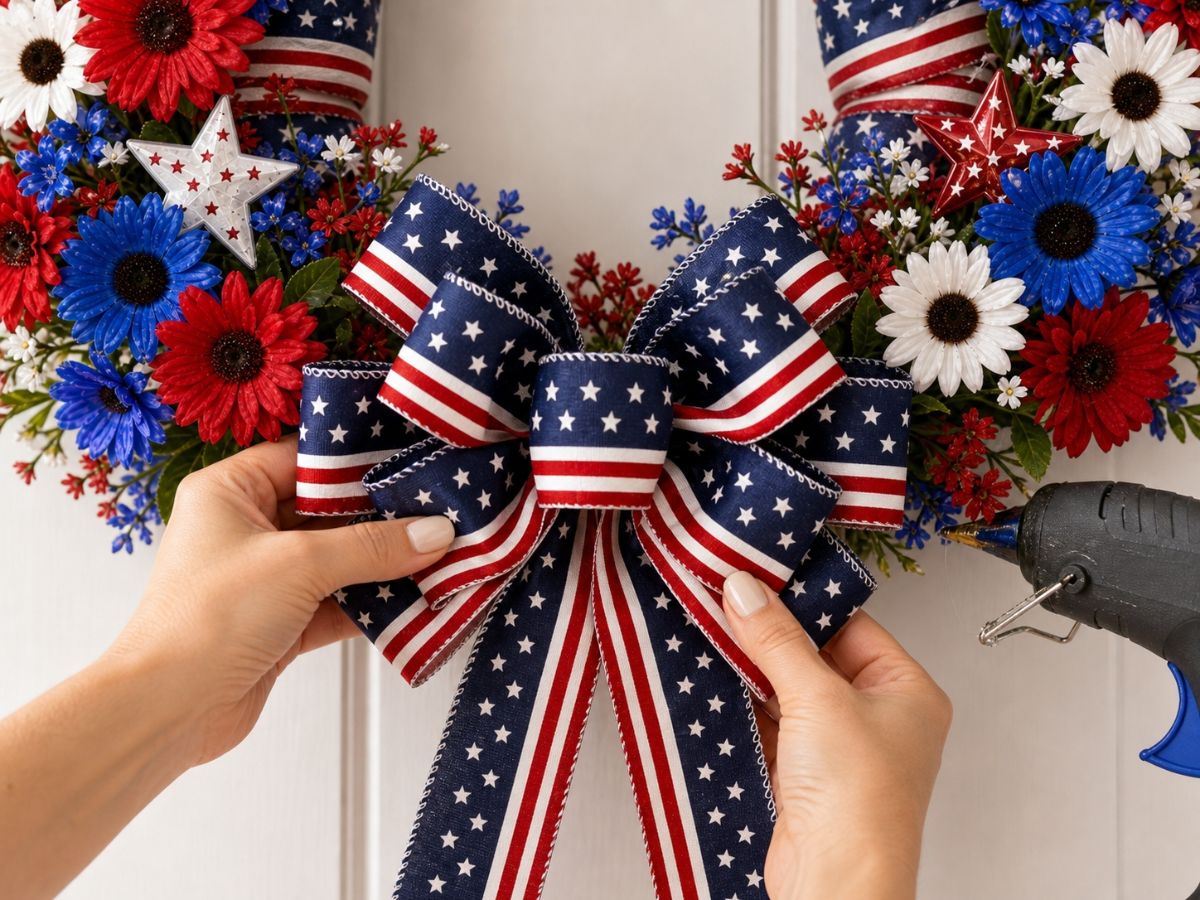
Hold the bow firmly for 30 seconds while the glue sets — it’s the focal point so you want it perfectly centered.
Final Touches & Hang!
Step back and take a good look at your finished wreath. Rotate it slightly if needed so the focal point sits centered. Check for any bare spots and fill them with small flower snippets or star accents. Make sure all your flags are upright and your bow is centered and fluffy.
When you’re happy, hang your wreath using the floral wire loop from Step 1 on a wreath hook over your door. Stand back, take a photo, and share it — you just made something beautiful!

Step back and admire your work — you made this!
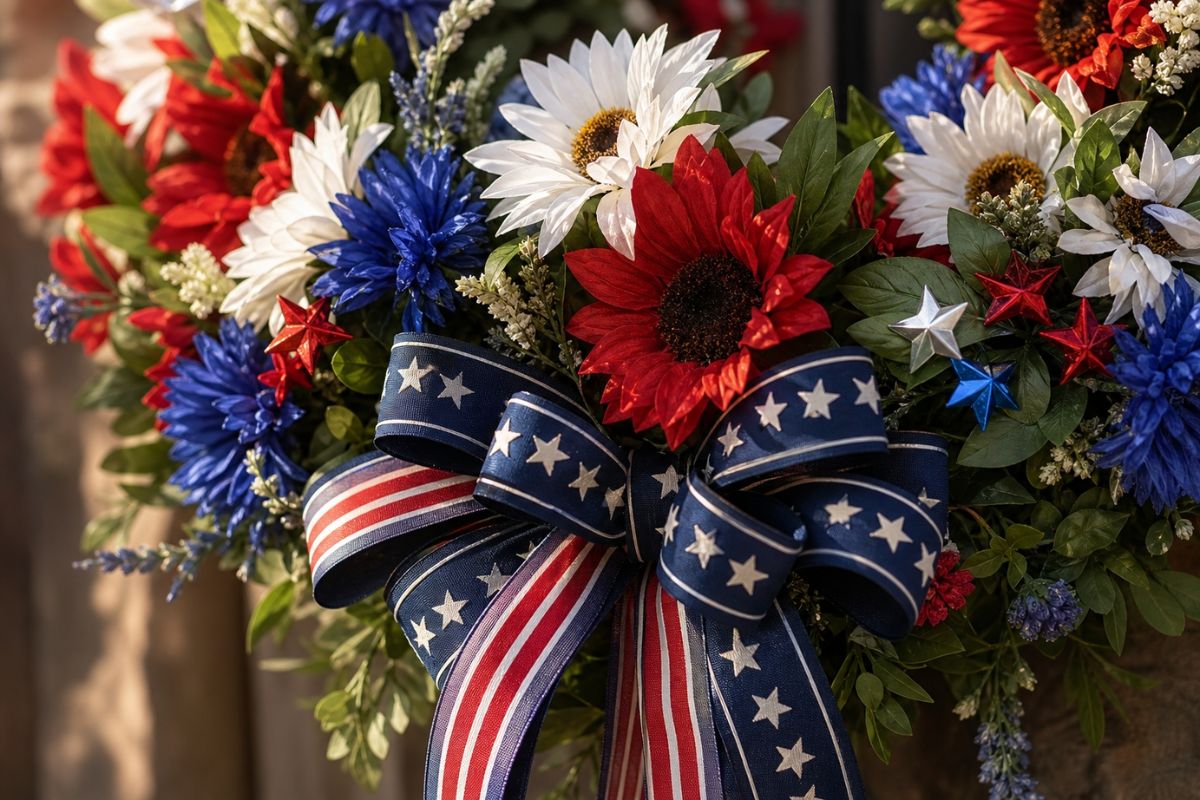
The combination of daisies, wildflowers, and the oversized bow gives this wreath its wow factor.
Frequently Asked Questions
Can I leave this wreath outside in the rain?
The artificial flowers and wired ribbon are moisture-resistant, and the straw form handles light weather fine. For heavy rain or prolonged outdoor exposure, I’d recommend bringing it inside or covering it — the flags especially will look better if you keep them dry. A light coat of spray sealant on the bow and flowers can also help extend their life outdoors.
Can I use a larger wreath form?
Absolutely! FloraCraft makes this form in several sizes. A 14- or 16-inch form gives you even more surface area to work with and creates a more dramatic look on larger doors. Just keep in mind you’ll need more ribbon and a few extra flower stems to fill the larger base.
What if I don’t have a hot glue gun?
You can use U-shaped floral pins for most of this project — they work especially well for stems and ribbon on a straw base. The bow may need glue or floral wire to hold it securely. A basic hot glue gun is inexpensive ($10–15 at any craft store) and is worth having for projects like this.
How do I store this after July 4th?
Gently place the wreath in a large plastic storage bag or wrap it in tissue paper and store flat in a lidded bin. Keep it somewhere cool and dry — the artificial flowers hold up beautifully from year to year, so you can absolutely reuse this wreath next Independence Day!
Can I add more decorations to make it more full?
Yes! The straw base makes it easy to keep adding. Some popular additions: extra greenery picks tucked behind the flowers, a banner that says “USA” or “Happy 4th,” or even a few battery-operated fairy lights woven through for an evening glow effect.